 IndoorComfortKit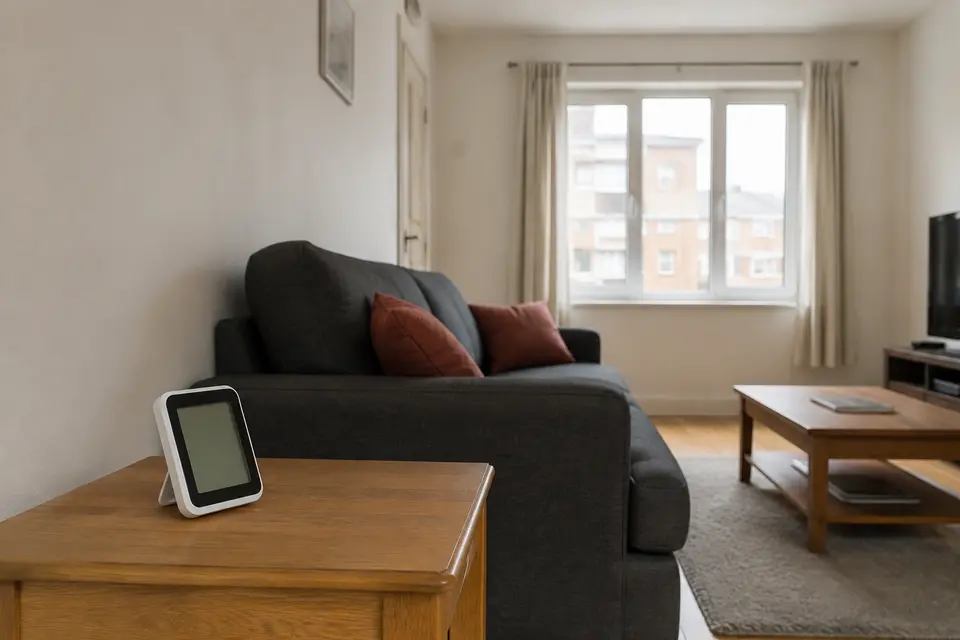
Why the sensor location can change the answer
A humidity calculator is only as useful as the reading you put into it. A hygrometer sitting on a sunny sill, beside a supply vent, above a damp towel, or next to a cold window can report a local pocket of air instead of the room pattern. That can make a normal room look damp, or hide a corner that needs attention.
Use this guide before judging a room from one number. It is especially useful when two rooms disagree, when a bathroom spikes after a shower, when a basement stays high, or when a cooled room still feels sticky. IndoorComfortKit uses humidity as a watch signal, not as a diagnosis of materials, air quality, or safety. The goal is to place the sensor consistently enough that the next step is easier to choose.
For everyday rooms, this site uses about 30% to 50% RH as the preferred target, above 50% to 60% RH as an upper watch range, and persistent readings above 60% RH as a reason to check moisture and condensation patterns.
Choose a repeatable position and let the sensor settle
Measure temperature and relative humidity in the same location. Put the hygrometer near the main occupied area at about table height. Keep it away from supply vents, return grilles, radiators, portable heaters, humidifiers, dehumidifiers, wet towels, cooking steam, direct sun, and exterior glass.
After moving the sensor, wait until its temperature and relative-humidity readings stop changing noticeably before recording the normal room reading. A device moved from a very different condition, such as a cold basement to a warm bedroom, may need longer than one already in the room. For a recurring issue, take readings at the same spot and similar times across several days. Morning, late afternoon, and after moisture-heavy activities are usually more useful than random checks.
When a trouble spot matters, measure in two steps. First record the main room reading. Then move the hygrometer near the closet, window, basement wall, or bathroom corner and wait again. The difference between the main room and the trouble spot often tells more than either number alone. Use the Indoor Humidity Comfort Calculator for the main room and the Room Moisture Watch Calculator when repeated dampness appears in one location.
Compare hygrometer locations
| Sensor location | Why the reading may be distorted | Better comparison method |
|---|---|---|
| Directly beside a supply vent or portable heater | Fast moving heated or cooled air may not represent the occupied room | Move to a table or shelf in the occupied zone and let the sensor settle again. |
| On a sunny sill or against exterior glass | Solar heat or a cold surface can create a local pocket unlike the room center | Record the main room first, then make a separate window-area observation. |
| Above a damp towel, shower, kettle, or humidifier | A nearby moisture plume can produce a temporary local peak | Move away from the source and compare before and after the activity. |
| On the floor or inside a crowded cabinet | Low air movement and surface temperature can exaggerate a hidden pocket | Use an open shelf around table height for the repeatable room reading. |
| In direct dehumidifier discharge | Dry outlet air can make the equipment appear more effective than it is | Measure in the room’s occupied area and use the same spot for follow-up readings. |
Recheck a bathroom after a shower
The bathroom, basement, and bedroom below are hypothetical placement examples, not measured records from our home. Their readings are assumed to explain repeated checks; the timing is not a guaranteed recovery period or a universal sensor-settling specification.
A bathroom reads 76% RH immediately after a shower while the hallway reads 44%. That spike is expected. Leave the fan running, open the door when practical, and recheck after 30 minutes and again after about an hour. If the bathroom falls near the hallway reading, the pattern is short-lived. If it stays above 60% RH for a long time, check the fan, door gap, wet towels, and surfaces that stay damp.
A basement reads 63% to 67% RH at table height for three mornings in a row, while an upstairs room stays around 45% to 48%. That pattern is more useful than one high reading. It suggests a basement-specific moisture load or cool-surface pattern. Before buying equipment, check gutters, obvious leaks, stored cardboard, air movement, and whether the reading changes after doors open. Then compare the pattern with the Dehumidifier Size Calculator.
A small bedroom cools from 75 F to 70 F quickly after a window AC starts, but the hygrometer near the bed still reads 57% to 60% RH. A sensor placed directly in the cold supply air might show a different number, so use the occupied area instead. Short cooling cycles can drop temperature without much moisture removal. If that happens repeatedly, read why an oversized AC feels humid before choosing a larger unit from the AC BTU Calculator.
Keep a location-based room reading log
Use one repeatable location first. Label it in your notes as “bedside table,” “basement desk,” or “living room shelf” so future readings mean the same thing. Include the room temperature with each humidity value because relative humidity changes as temperature changes.
Compare rooms before concluding that the whole home has one pattern. A closed bedroom, a laundry area, a basement, and a kitchen-connected room can all behave differently. If one device seems suspicious, place two hygrometers side by side long enough for both readings to stabilize and see whether they track in the same direction. Sensor accuracy varies by model, age, calibration, battery condition, and placement, so trends are often more useful than a single exact value.
Keep the sensor visible but not in the way. Avoid drawers, crowded shelves, direct window ledges, and the floor. Replace batteries when readings become slow or erratic. If you use a dehumidifier or humidifier, do not place the hygrometer directly in its airflow; measure the room, not the machine outlet.
What a room hygrometer does not measure
A room hygrometer does not inspect hidden wall cavities, test air quality, identify material conditions, approve equipment, or certify a room. It only reports local air conditions near the sensor. Surface temperature, air movement, insulation, leaks, outdoor weather, and how long moisture has been present still matter.
EPA gives general moisture-control background, and ENERGY STAR describes a hygrometer as a way to monitor room relative humidity separately from appliance controls. The placement and settling steps above are IndoorComfortKit’s repeatable room-measurement protocol, not an inspection standard; sensor accuracy and settling time vary by model. Treat readings as notes for what to check next. If there is active water, damaged material, repeated staining, unusual electrical conditions, sewage, flood water, or a concern that goes beyond normal room comfort, use qualified help and local guidance.
Related calculators
Start with the Indoor Humidity Comfort Calculator after the hygrometer has settled in a normal room location. Use the Dew Point Calculator for Indoor Rooms when condensation appears on glass, pipes, or exterior walls. Use the Room Moisture Watch Calculator when the same spot repeatedly stays damp or high.
Blank observation sheet
These spaces are for your own notes, not sample measurements. Start with one ordinary room and a repeatable sensor position. Record only what you actually read; an empty time or value means unknown.
| Actual local date and time | Temperature and unit | RH (%) | Sensor and spot | Room activity |
|---|---|---|---|---|
| Reading 1: ______ | ______ | ______ | ______ | ______ |
| Reading 2: ______ | ______ | ______ | ______ | ______ |
| Reading 3: ______ | ______ | ______ | ______ | ______ |
| Reading 4: ______ | ______ | ______ | ______ | ______ |
Follow the meter's instructions for placement and settling. If its accuracy or settling time is unknown, write that down. Keep necessary heating, cooling and ventilation in ordinary use; this sheet is not a reason to create damp conditions or delay addressing water.
Summer / cooling: note whether the AC was running at each reading. Winter / heating: note the side of the window where water appears; room air temperature is not a glass-temperature measurement. A pair of readings cannot establish cause or recovery time.
 Download blank sheet
Read temperature and humidity during cooling · Compare the room and window in winter
Sources and method notes
EPA mold and moisture guide
Source checked:
Supports: Using a moisture or humidity meter, keeping indoor RH below 60% when possible and ideally between 30% and 50%, and checking condensation and direct moisture sources.
Does not support: A universal sensor height, settling time, placement protocol, device accuracy, calibration interval, or room-safety interpretation.
ENERGY STAR humidity monitoring guidance
Source checked:
Supports: Using a hygrometer to monitor RH, placing it near a dehumidifier when the unit lacks a readable humidistat, and general 30% to 50% RH context.
Does not support: IndoorComfortKit's repeatable occupied-zone placement workflow, a fixed settling period, cross-device accuracy, or diagnosis from a room reading.